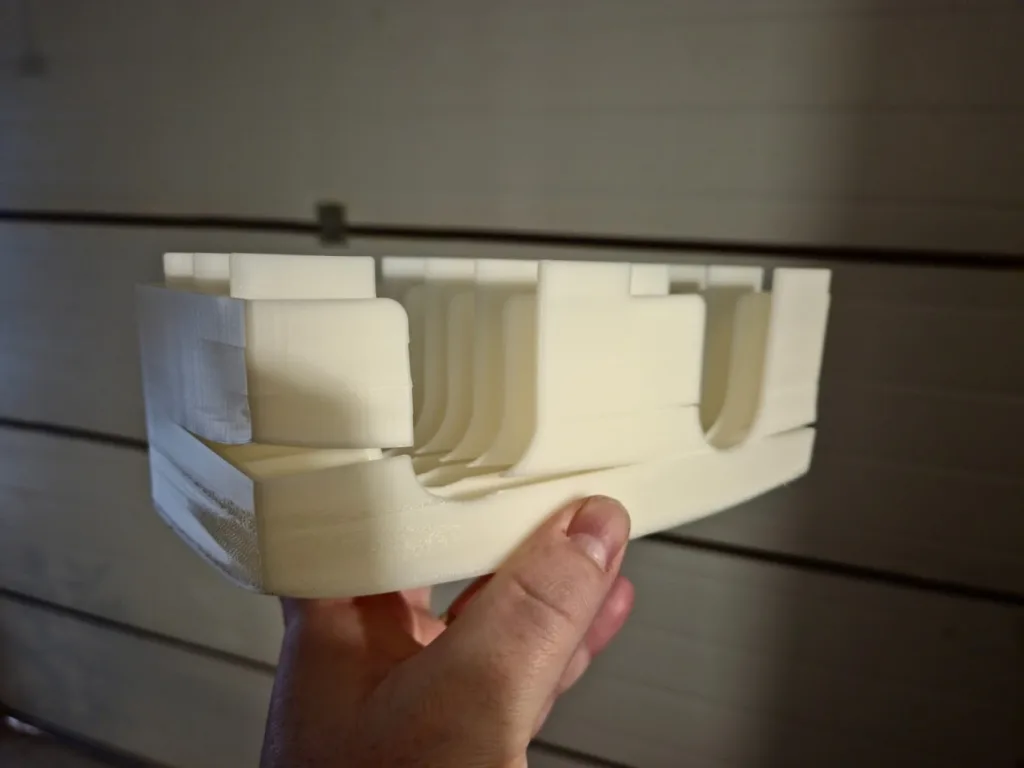
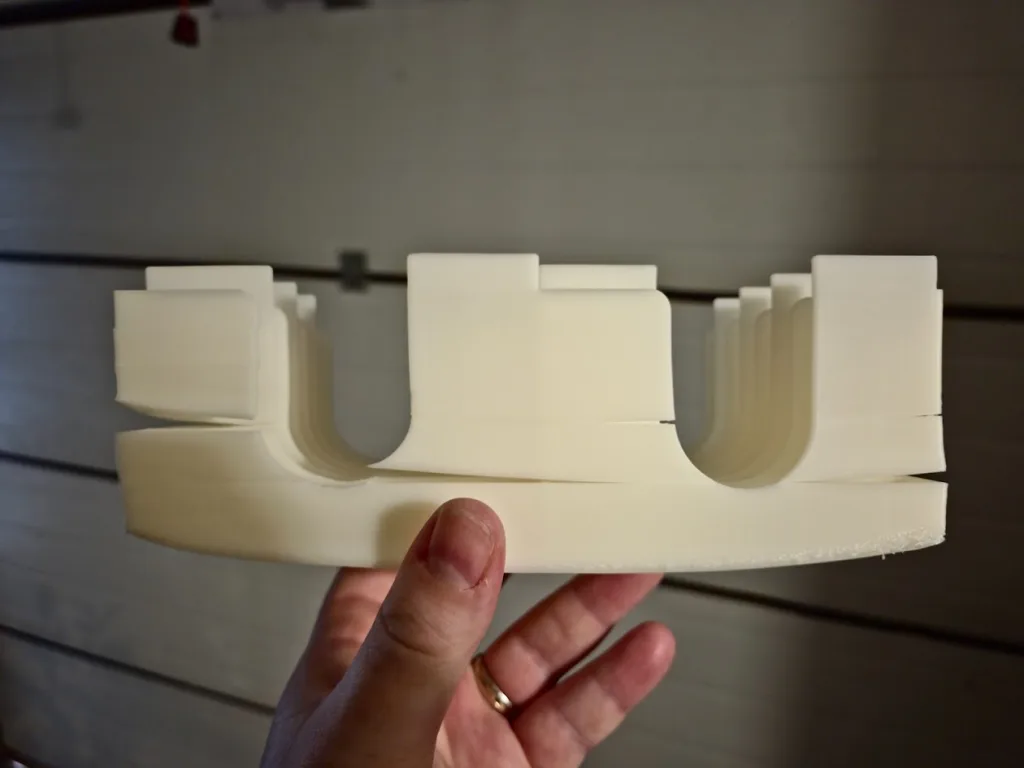
You ever have one of those days where your 3D prints just refuse to cooperate—like your printer suddenly grew an attitude? That was us last week. We were all set to dive into some boardgames insert prints, feeling good, sipping our coffee, and dreaming of beautifully crisp layers. And then? Curve city. Warped corners, peeling edges, and models that looked more like abstract art than anything useful.
Honestly, it felt a bit like the filament gods were laughing at us.
But, as any seasoned maker will tell you, 3D printing is about persistence. So, instead of throwing in the towel (or the ABS roll), we turned it into a bit of a challenge—and what we discovered might just help you too.
Running out of filament? Refill on Amazon or if you prefer directly from SUNLU you can use this link.
The ABS Struggle is Real – Still Warped
If you’re familiar with ABS (Acrylonitrile Butadiene Styrene—yeah, it sounds like a chemistry quiz), you know it’s a bit of a diva. It’s strong, temperature-resistant, and great for functional prints… if you can get it to stick to the bed and not warp like a curling ribbon.
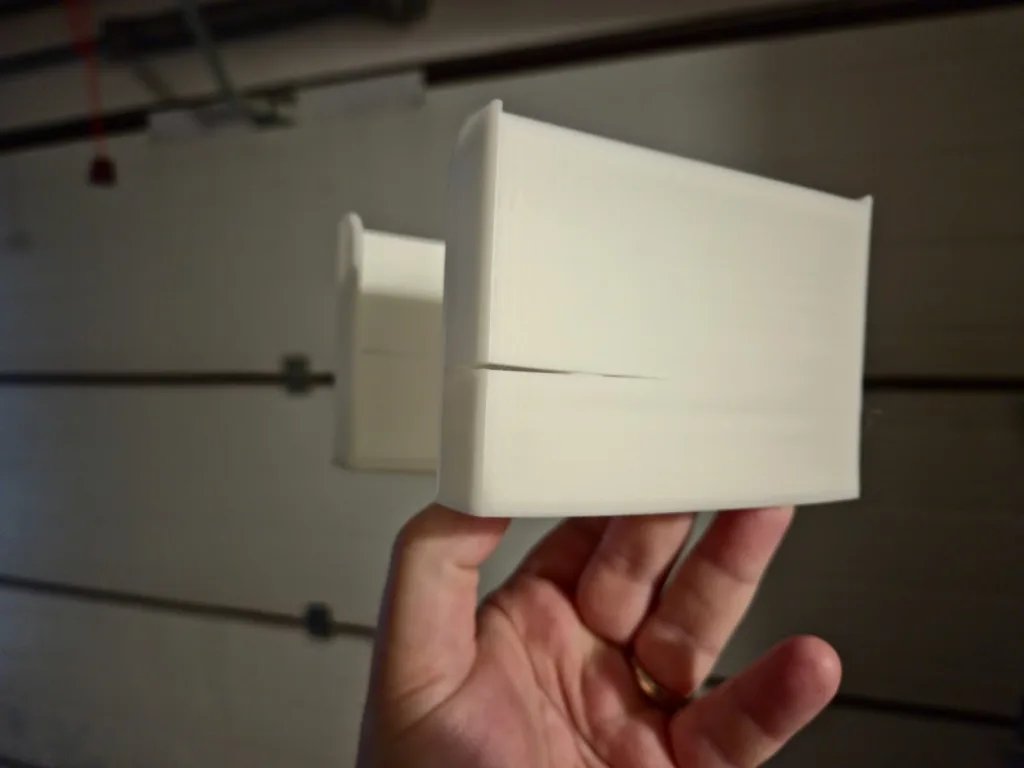
When we first started printing with it again, we ran into that classic problem: warping. The base of our prints would curl up from the bed, sometimes subtly, sometimes dramatically enough to make the entire object look like it was trying to do yoga.
We’d print a corner, and by the time it hit layer ten, you could slip a business card under half the base. Frustrating doesn’t even cover it.
Things We Tried (That Mostly Didn’t Work To Fix The Warped Edges)
So, naturally, we did what anyone would do in our shoes—we went down the rabbit hole of print settings, forums, and frantic trial and error. Here’s a quick list of the tweaks we tried before stumbling on the magic fix:
- Increased bed temperature – We cranked it up to 110°C, which helped a little, but didn’t fix the core issue.
- Enclosure – ABS hates drafts and cool air, so we made sure the printer was cozy and closed up tight. Again, not enough on its own.
- Slower speeds, lower fan – This helped smooth out the layers, but adhesion? Still shaky.
- Thicker brims – Adding a brim is like giving your print training wheels—it adds a little extra surface area to help it stay put. It helped… but the warping didn’t completely go away.
At this point, we were a few test prints deep, slightly annoyed, and very caffeinated.
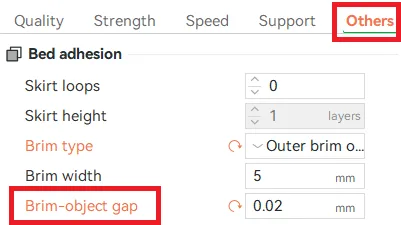
The Unexpected Fix: Brim-Object Gap to the Rescue
And then—lightbulb moment. While fiddling with brim settings (because why not?), we decided to try setting the Brim-Object Gap to 0.02mm. That’s a teeny-tiny number, basically like asking the brim to hug the print instead of just holding hands.
Boom. Suddenly, our prints started sticking like they were supposed to. The brim clung tight to the base layer, keeping everything grounded like a good anchor. Warping? Gone. Corners? Flat and fabulous.
Now, before we dive further, if you’re not familiar: a brim is a thin outline of extra filament that’s printed around your model’s base, almost like a flat skirt. It slightly touches the actual model—unless you change the Brim-Object Gap, which is exactly what we did.
Setting that gap to 0.02mm made the brim basically fuse with the first layer, which improved adhesion significantly. Yes, it made the brim a pain to remove—think of peeling tape off a brand-new book cover—but we’ll take a stubborn brim over warped prints any day.
What We Learned (Besides Patience)
This whole experience was a reminder that 3D printing is as much about curiosity as it is about precision. It’s easy to get frustrated when things go sideways, but sometimes the tiniest setting makes all the difference.
Here’s what we’re taking forward:
- Don’t underestimate the small stuff. That little gap setting was buried in a submenu most folks probably skip over. Look there. Tinker.
- Every filament has its quirks. PLA is chill. PETG’s got its own drama. But ABS? ABS wants love, heat, and a solid foundation. Treat it right, and it’ll reward you.
- The brim is your friend. Seriously. If you’re struggling with warping, go back to the brim and get creative with it. It’s more powerful than it looks.
Got ABS Warping Woes? Let’s Share Tips
If you’re reading this because you’ve been wrestling with warped prints and curled corners—first of all, you’re not alone. We’ve been there, and we feel your pain.
Have you found other hacks that work with ABS adhesion? A favorite build plate type? Secret setting you swear by? Drop it in the comments or shoot us a message. Let’s crowdsource some brilliance and help each other print better.
Because at the end of the day, we’re all just out here trying to make cool stuff—and maybe, just maybe, have a little fun while we’re at it.
Happy printing, and may your corners always stay flat. 😊
Pingback: We Printed a Dice Tower in Grey ABS - And Love It